Import from S3 buckets
Silota can automatically upload files from a S3 bucket into your database at a periodic interval. This is a great solution to sync auto-generated and machine-generated files with your database for further analysis.
An example use-case is to upload Amazon's detailed billing reports into your database.
Setup
1. Creating the S3 connection
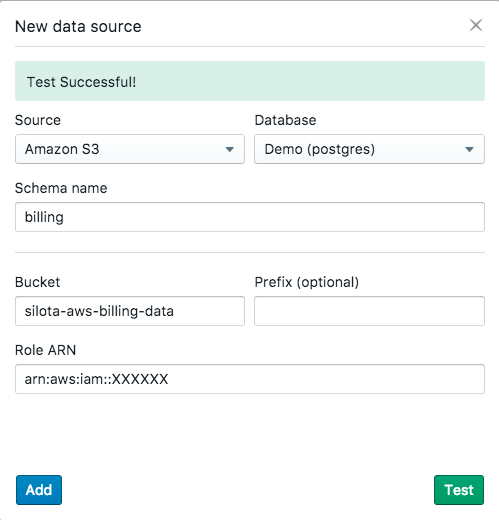
To create a S3 connection, you'll need the following information:
- destination schema name on your database
- the S3 bucket name
- a prefix to apply to the names in the bucket (applied to path
bucket_name/folder_name/file_name) - a role ARN with the right permissions to read the bucket (instructions below)
Once you've input the necessary details, you can test your connection. If the test succeeds, you can then save the connection and Silota will start uploading data from your S3 bucket to your database in a short while.
2. Creating a Policy for Silota to access your bucket
Silota requires a IAM Role in order to access your bucket.
For cross-account access, imagine that you own multiple accounts and need to access resources in each account. You could create long-term credentials in each account to access those resources. However, managing all those credentials and remembering which one can access which account can be time consuming. Instead, you can create one set of long-term credentials in one account and then use temporary security credentials to access all the other accounts by assuming roles in those accounts.
Goto the IAM Console.
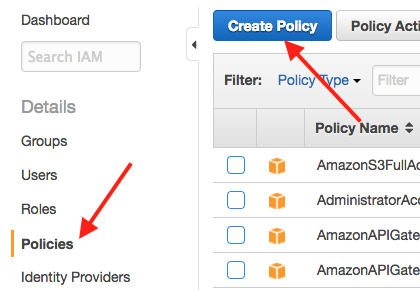
Click "Policies" on the side bar, and then click "Create Policy"
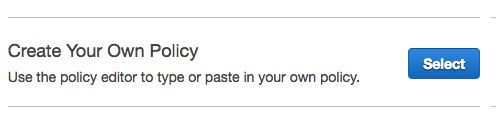
Select "Create Your Own Policy"
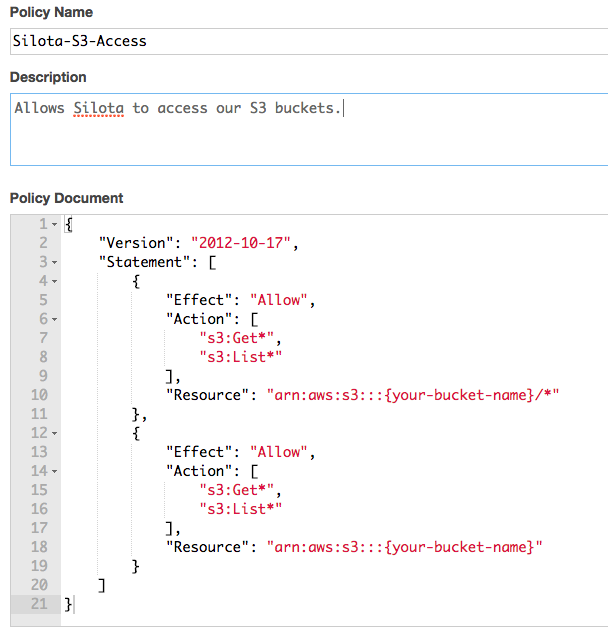
    {
    "Version": "2012-10-17",
    "Statement": [
        {
            "Effect": "Allow",
            "Action": [
            "s3:Get*",
            "s3:List*"
            ],
            "Resource": "arn:aws:s3:::{your-bucket-name}/*"
        },
        {
            "Effect": "Allow",
            "Action": [
            "s3:Get*",
            "s3:List*"
            ],
            "Resource": "arn:aws:s3:::{your-bucket-name}"
        }
        ]
    }
Name the policy "Silota-S3-Access"
3. Creating an IAM Role for Silota
Click "Roles" and then "Create New Role"
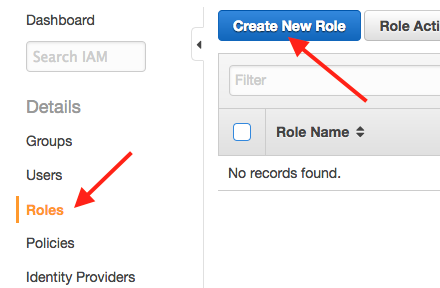
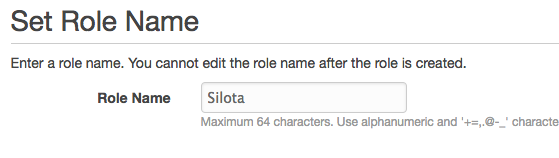
Name the role "Silota" and click "Next Step"
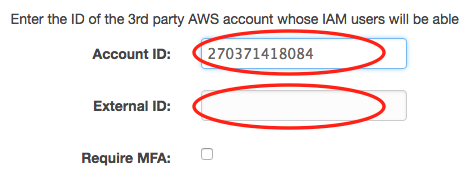
Select "Role for Cross-Account Access", then "Allows IAM users from a 3rd party AWS account to access this account":

Enter Silota's account ID 270371418084, and the external ID available on your Silota dashboard.
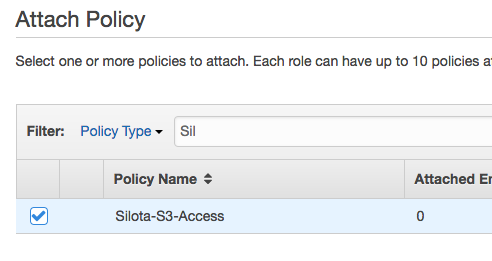
Select the policy "Silota-S3-Access" you created earlier:
Click "Create Role"
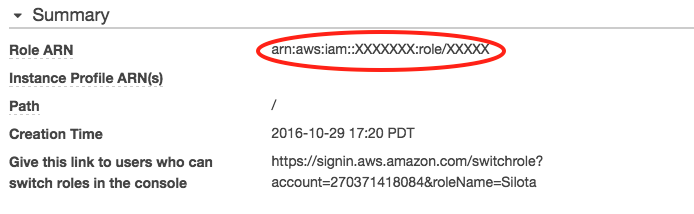
Your Role ARN should be available from the summary page:
 Onboarding forward-thinking teams now:
No spam, ever! Unsubscribe any time. Learn more about the product.